Azure AD Connect: In place Upgrade Windows Azure Active Directory sync (DirSync)
|
In-place upgrade Wizard
1. Launch the Azure AD Connect installer (MSI), Review and agree to license terms and privacy notice.
3. Click next to begin analysis of your existing DirSync installation.
4. When the analysis completes, we will make recommendations on how to proceed.
- If you u use SQL Server Express and have less than 50,000 objects, the following screen is shown:
- If you use a full SQL Server for DirSync you will see this page instead
|
- If you have more than 50,000 objects, you will see this screen instead:
To proceed with an in-place upgrade, click the checkbox next to this message: Continue upgrading DirSync on this computer. To do a parallel deployment instead you will export the DirSync configuration settings and move those to the new server.
5. Provide the password for the account you currently use to connect to Azure AD. This must be the account currently used by DirSync.
 |
If you receive an error and have problems with connectivity, please see Troubleshoot connectivity problems.
6. Provide an enterprise admin account for Active Directory.
|
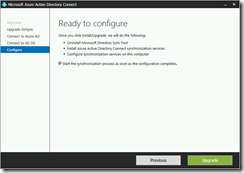
7. You’re now ready to configure. When you click Upgrade, DirSync will be uninstalled and Azure AD Connect will be configured and begin synchronizing. |
8. After the installation has completed, sign out and sign in again to Windows before you use Synchronization Service Manager, Synchronization Rule Editor, or try to make any other configuration changes.
Customize Azure AD Connect sync
After your initial installation of Azure AD Connect, you can always start the wizard again from the Azure AD Connect start page or desktop shortcut. You will notice that going through the wizard again provides some new options in the form of Additional tasks.
The following table provides a summary of these tasks and a brief description on each of them.


